With Credivera you can:
- Add and manage credentials such as certifications, licenses, and qualifications
- Share verified credentials with employers or organizations
- Complete assigned requirements and documents
This guide will help you get started quickly and complete the most common tasks in Credivera.
1. Accessing Credivera
You can access Credivera through your organization’s employee portal or by signing in directly at https://my.credivera.com. Before you can access Credivera, you’ll need an account. There are two ways to create one:
- If your organization does not use single sign-on (SSO), you will receive an email invitation to create your Credivera account. Open the invitation email, click the activation link, and follow the prompts to create your password. Once you’ve set your password, your account is ready to use.
If you haven’t received an invitation, contact your employer or organization administrator to request one. - If your organization uses single sign-on (SSO), simply sign in to Credivera using the same email address and password you use to access your organization’s other applications. No separate Credivera password is required.
2. User interface overview
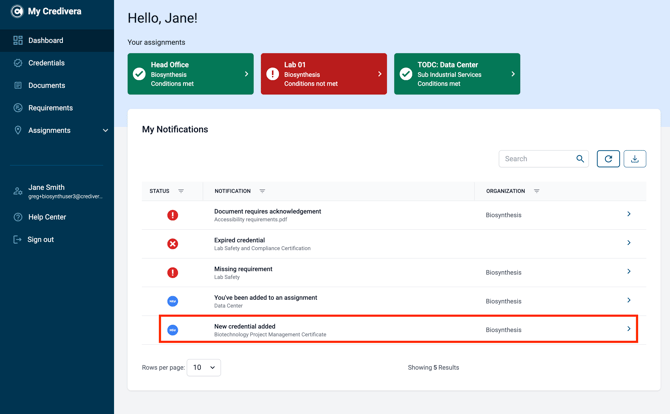
After signing in, you’ll arrive at the Dashboard, your central hub for managing activities in Credivera. From here, you can quickly see assignments you’re participating in, review notifications that require your attention, and access other important information at a glance.

Key areas include:
- Credentials: Your secure digital wallet for storing, managing, and securely sharing your credentials.
- Documents: Any documents your organization distributes are available here for easy access.
- Requirements: A list of requirements set by your organization that you must complete to remain compliant.
- Assignments: A list of all assignments you have been added to.
Use the navigation menu to move between sections.
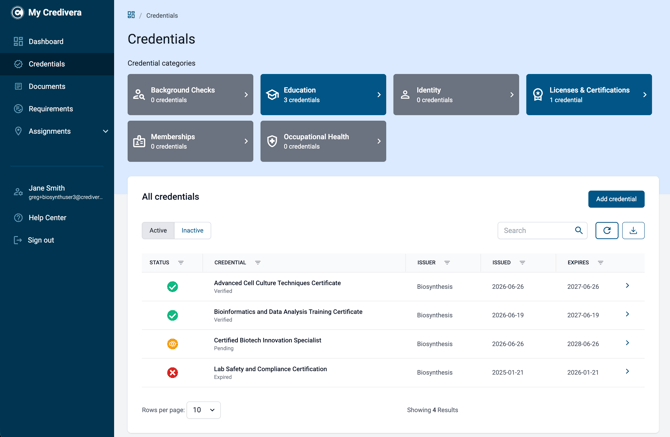
3. Your credentials
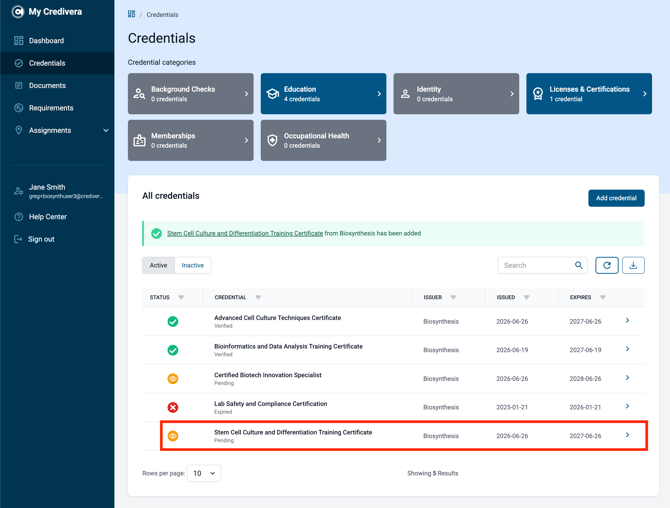
To access your wallet, select Credentials from the main navigation menu. This will open your digital wallet, where you can view all of your stored credentials along with their current status.
Adding a credential
To add a credential to your wallet, follow these steps:
- Click Add Credential to open the Add Credential window.
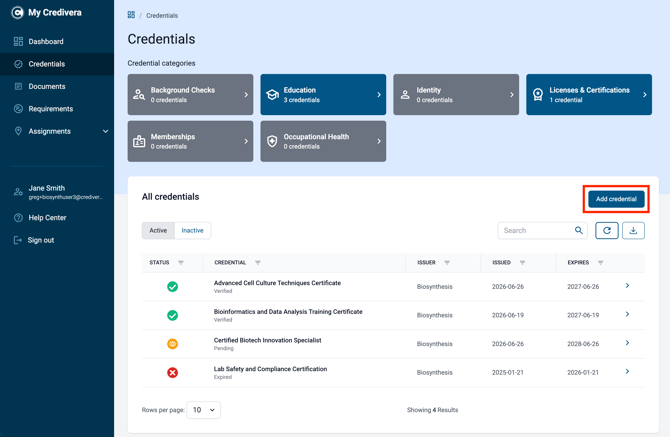
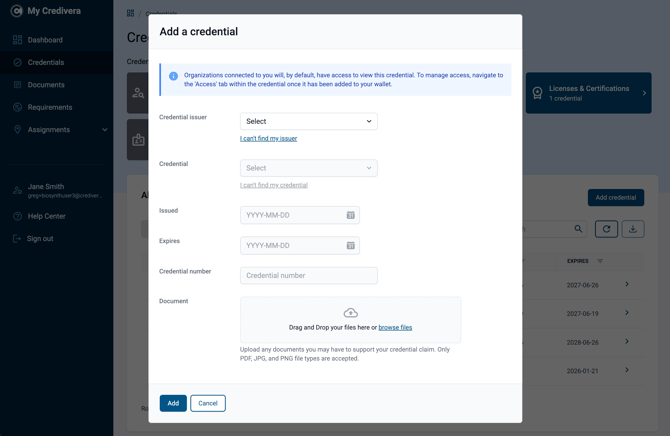
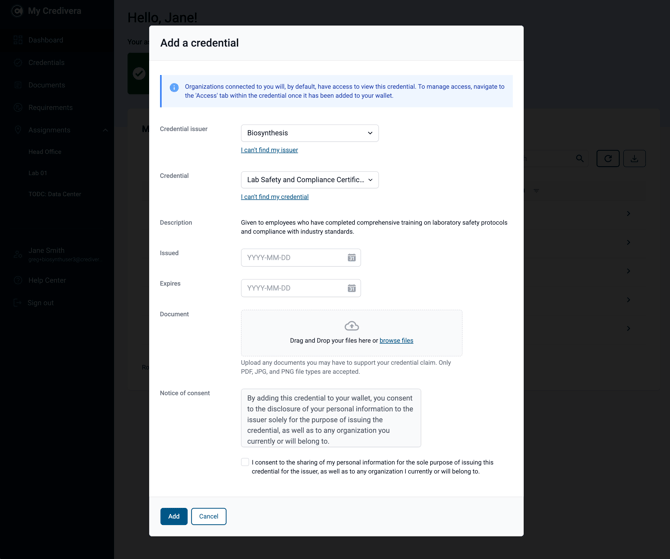
- In the Add Credential window, follow the steps below to add a credential:
- Begin by selecting the issuer you want to claim a credential from, then choose a credential from that issuer’s catalogue.
- Next, enter the issue date and expiry date of your credential. These fields will appear if the issuer requires this information as part of your claim.
- If you have digital proof of your credential (such as a PDF), you can attach it to support your claim. This step is optional.
- Review and accept the consent notice, which confirms that submitting a claim will share your information with the issuer so they can validate your credential.
- Finally, click Add to save the credential to your wallet.
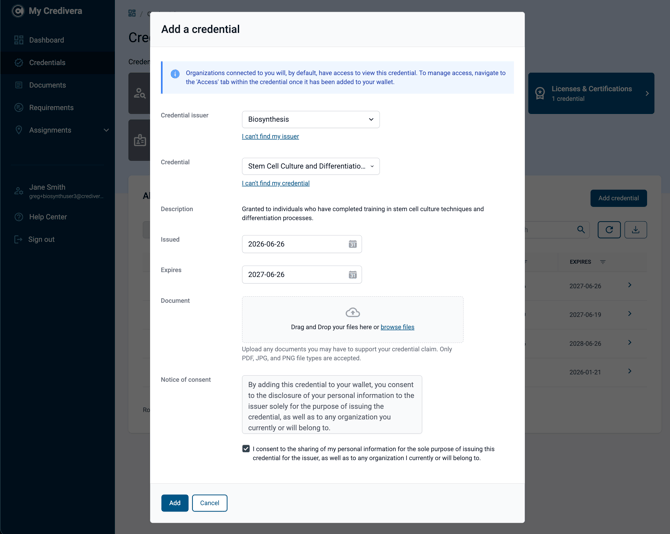
- Your selected credential has now been added to your wallet. It will remain in a Pending state until the issuer reviews and approves your claim. Once approved, the status will automatically update to Verified.
- If you can’t find the issuer or credential you’re looking for, you can manually add it to your wallet by following the steps below:
- In the Add Credential window, select the I can’t find my issuer link.
- Enter all required information, and attach proof of your credential if available (recommended).
- Finally, select Add to save the credential to your wallet.

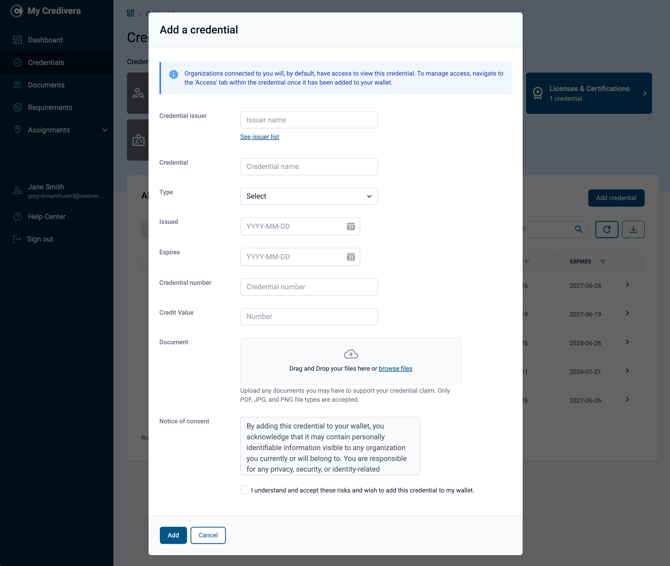
Any credential added this way will be assigned a Self-Verified status. This indicates that the credential has been self-attested and was not directly issued or verified by an organization.
Issued credentials
You don’t always need to manually claim a credential. Some credentials are delivered directly to your wallet when they are issued by another organization within the Credivera Exchange.
When this happens, you’ll typically receive a notification by email and in your dashboard letting you know that a new credential has been added to your wallet.
Viewing credential details
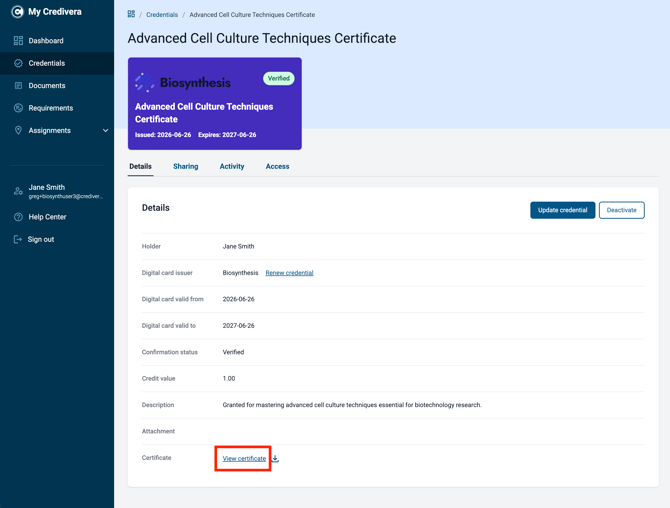
To view a credential’s details, click the name of the credential from your wallet.
On the Details tab, you can view detailed information about your credential.
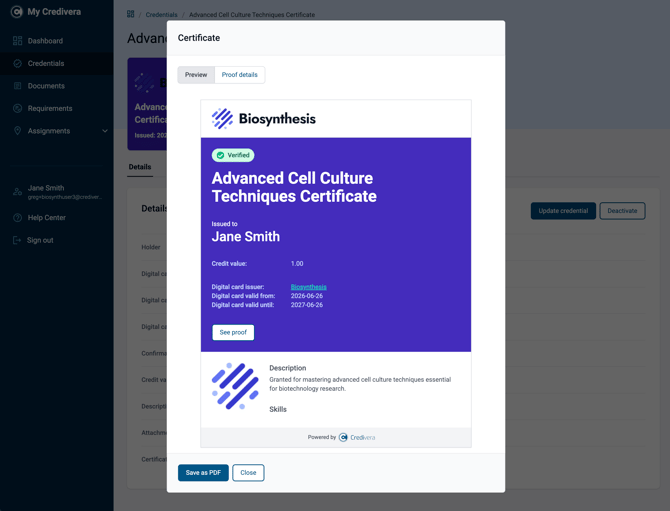
To preview the credential certificate, select View Certificate. A preview of your credential will open in a new window, allowing you to see exactly what others will see when you share the credential.
Sharing credentials
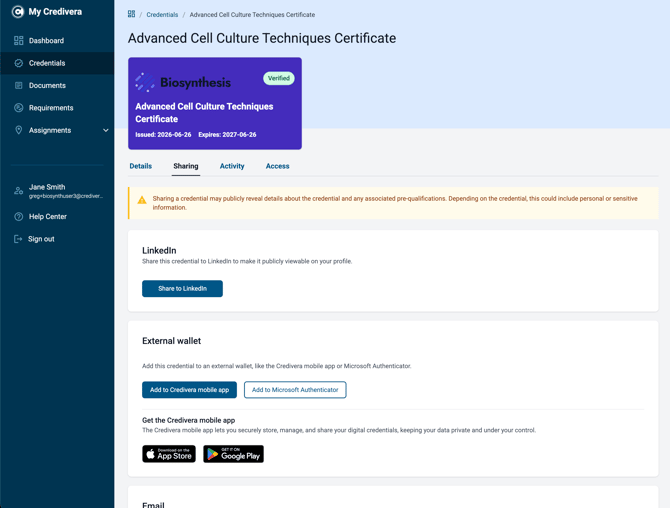
To share a credential, open the Sharing tab. From here, you can choose from several secure sharing options
- LinkedIn: Share your achievement with your professional network by posting your credential to LinkedIn.
- Email: Send a secure link to your credential certificate directly to another person by email.
- Temporary Link: Generate a temporary shareable link that you can send through any messaging or communication platform.
Anyone you share a credential with will receive a secure link that allows them to view your credential certificate.
You can also add your credential to an external digital wallet, such as the Credivera mobile app or Microsoft Authenticator. Storing your credential on your mobile device allows you to securely access and present proof of your credentials, even when you don’t have an internet connection.
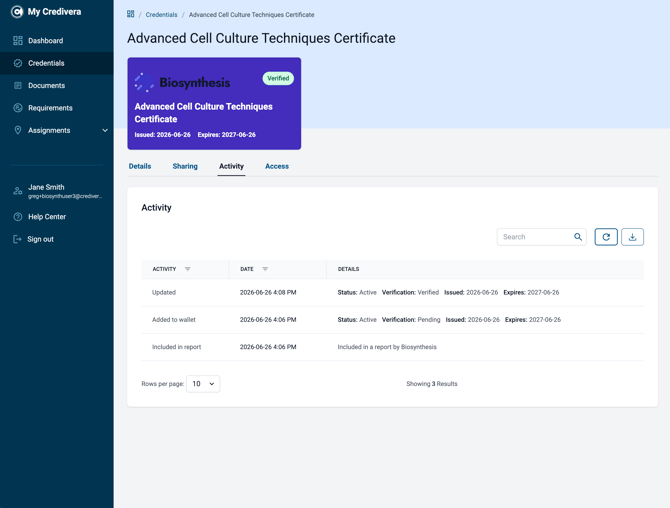
Credential activity
To view a credential’s activity history, open the Activity tab. Here, you’ll see a timeline of events related to the credential, including when it was added to your wallet, updated, shared, included in a report, or submitted to satisfy a requirement.
The activity history provides a complete audit trail of how the credential has been used by you and, where applicable, your organization.
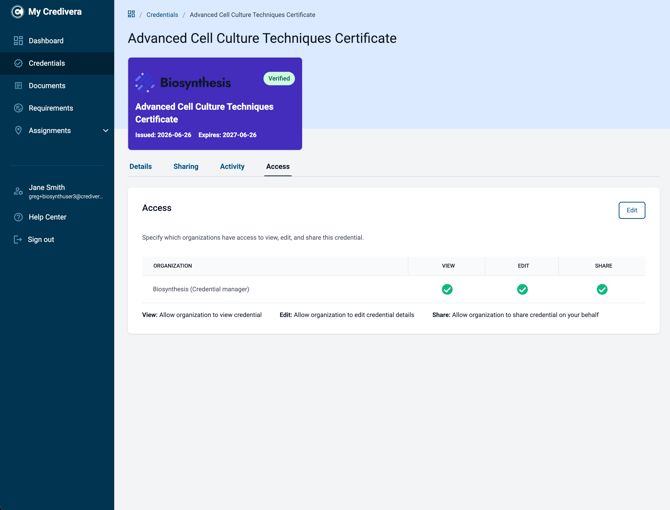
Credential access
To view who has access to your credentials, open the Access tab. Here, you can see a list of organizations and the permissions they have for each credential.
You can also update or modify permissions, except for your credential issuer or employer, who will always retain full access.
4. Requirements
A requirement is a credential or qualification you must provide or keep up to date to be eligible for work or assignments.
In Credivera, your employer may assign you requirements to confirm you meet compliance needs.
When you are assigned a requirement, you will receive a notification on your dashboard.
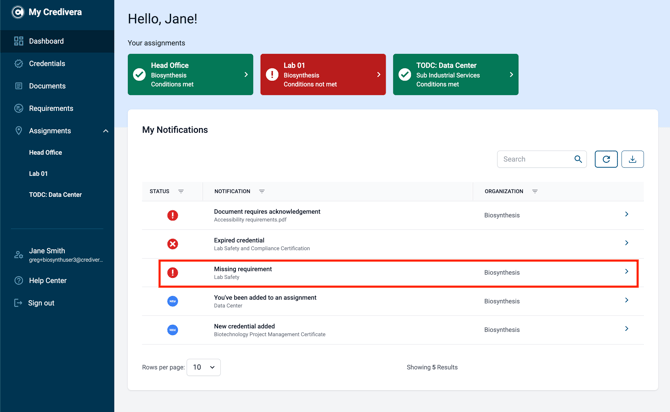
You can also view all requirements assigned to you by selecting Requirements from the main navigation menu.

Submitting a credential
If you already have the exact credential specified in the requirement, the system will automatically submit it on your behalf and mark the requirement as complete.
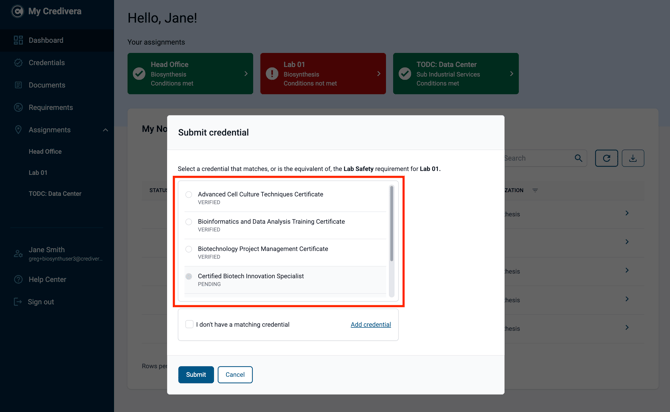
If you do not have the exact credential but have an equivalent you would like to submit instead, click the notification or the name of the requirement to open the Submit credential window.
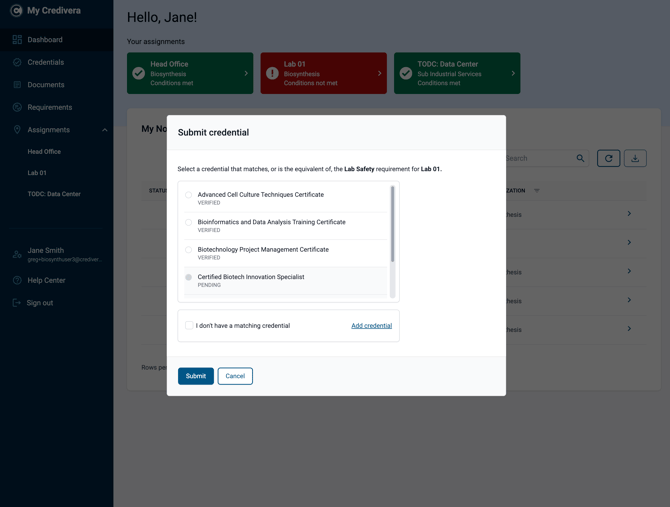
In the Submit Credential window, you can select a credential to share from your list of held credentials. Only credentials with a valid status can be submitted.
Once submitted, the requirement will be marked as complete after an administrator reviews and accepts your submission.
Don’t have a credential to submit?
If you do not have an equivalent credential to submit, you can choose one of the following options:
-
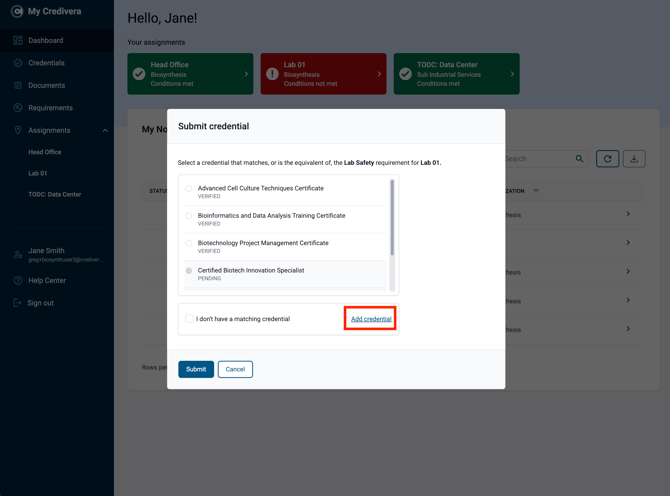
Add the credential to your wallet: Select the Add Credential link to open the Add Credential window. This is the same flow as usual, but the credential requested in the requirement will be pre-selected for you. Follow the remaining steps to add it to your wallet.
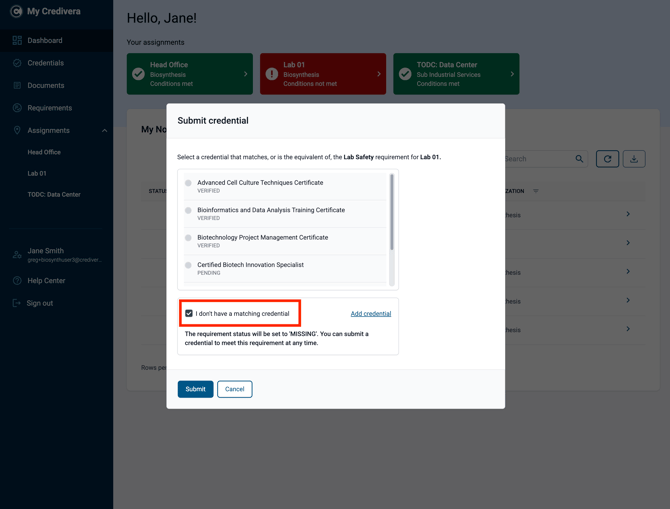
- Inform your administrator that you do not have the credential by selecting the I don’t have a matching credential checkbox. This notifies your employer that you are unable to submit the requested credential and allows them to follow up with you directly.
5. Documents
Your organization may occasionally distribute documents for you to review or review and acknowledge. When this happens, you’ll receive a notification in your dashboard.
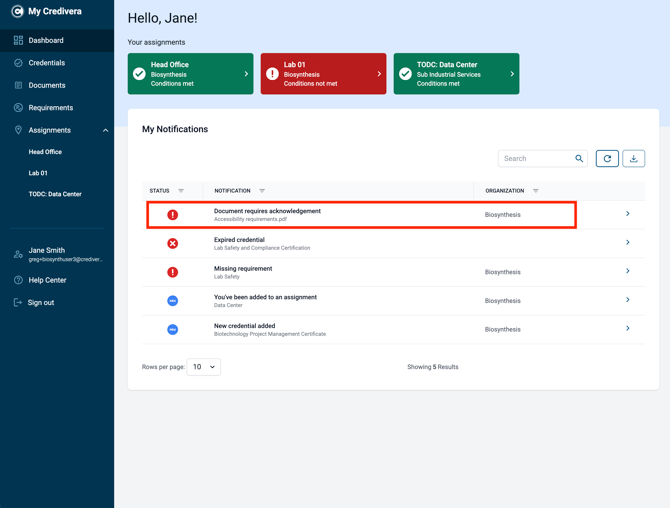
You can also view all documents assigned to you by selecting Documents from the main navigation menu.
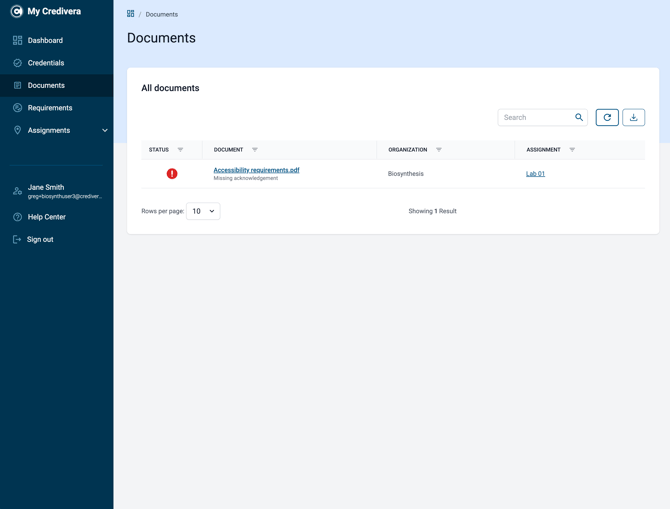
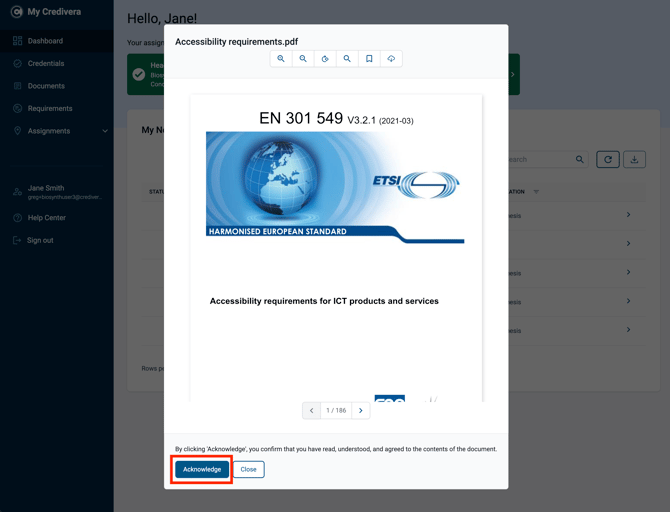
Viewing a document
To view a document, select either the notification or the document name. This will open a window where you can view the document and download it if needed.
If you are required to acknowledge the document, select the Acknowledge button at the bottom of the window. This confirms that you have read, understood, and agree to the contents of the document.
6. Assignments
Assignments help organizations organize and manage their workforce. An assignment can represent a physical job site, a job role or title, or a group of individuals.
If you are added to an assignment, you will receive a notification in your dashboard. The assignment will also appear on your dashboard and under Assignments in the main navigation menu.
You may also be added to an assignment by another organization if your organization is working with them through Credivera. This enables both organizations to collaborate on a job and share resources.
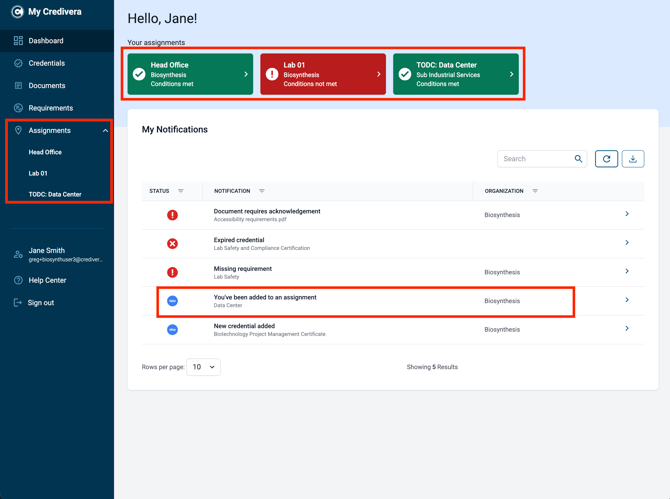
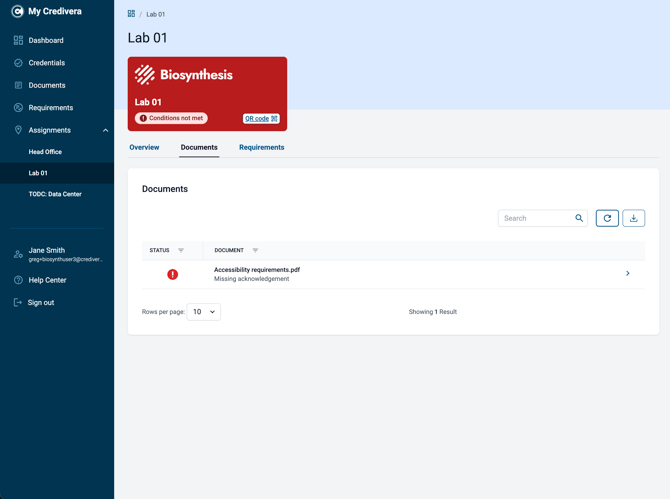
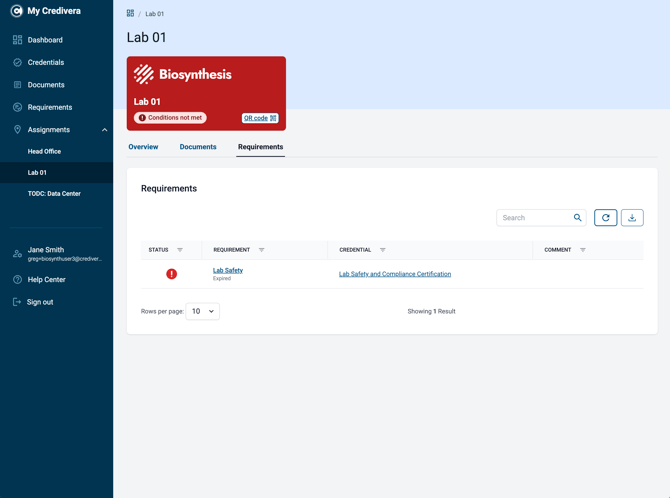
Often, requirements and documents are assigned to you as part of your participation in an assignment. In these cases, the assignment card may appear in red to indicate that you have outstanding requirements or documents to complete.
To view an assignment, select the notification or the assignment card from your dashboard, or choose the assignment name from the main navigation menu.
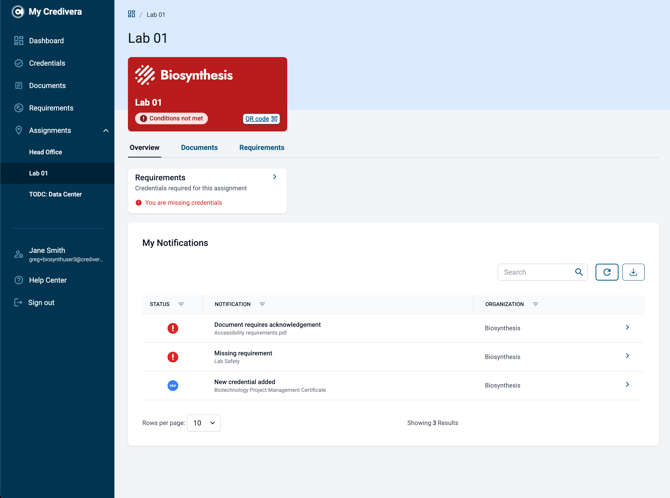
From the assignment view, you can see any assignment-specific notifications and access the assignment’s Documents and Requirements tabs.
You can respond to a requirement or document acknowledgement in the same way as you would from the dashboard or the Documents and Requirements sections.
Once all required documents and requirements are completed, the assignment status will update to Conditions met and display in green.